12/25/2011

New picture Snow Villiers and some tip

Hi again, this post I have easy tip to add more dark color to your picture.
It's the filter in photoshop call dark strokes.
You can find it in Filter tap > Brushes Strokes > Dark Strokes
Let's see what this filter can do.


This is finished picture and I want my color to be a little more darker.
What's I do is first duplicate the picture in new layer
(right click on layer and you'll see this option)
Click your new duplicate layer then go to
Filter tap > Brushes Strokes > Dark Strokes
You'll find yourself in dark strokes window. Now set the balance to 10,
black intensity = 1, white intensity = 5
(You can try the other number until you feel like it)
And the picture will look more darker.


Ok now the color have much more depth. XD
But I want it to look a bit more lighter so I change this layer mode to Darken
and lower the capacity to 50.


Now it's look better, not too dark and have the original picture feeling. :D
Ok that's the tip for today I hope it can be useful.


Merry Xmas 2011

Merry Christmas everyone.
Hope you have a good time this holiday.
As promise now is the time to unwrap the present. XD
Hoho next ones are the improve version of old Xmas pictures of 2009 and 2010.


Hope you like them. :p 

11/30/2011

Sketch November 2011

 Hi, everyone 
Hope you enjoy this month sketches.


The first one I try to draw this scene without the penis.


want a kitty? >w<


Goatee guy.


Try to add some clothes...um...maybe just pieces of fabric on him. - w -  


Want some sugar?


Hope you enjoy them. ^_^


11/28/2011

Body reference sheet and some pose

Finally the body reference. lol
This time are the very basic body for normal pose...
hmm I mean the steady pose or have a little movement not dancing, running
or kicking someone which will require more bending and twisting
in the body part. XD 


Part 1

It's show front view of the body in slightly different angle.
All of them can use for basic standing, sitting,
and some lying on the floor pose.You may feel curious now how these
body work. Hehe

Part 2

Here's some samples. The upper left is slinghtly bend his body like
"S" while bend down a little too. The upper right guy also
bend down his body a little while sitting.
So you can see their bodies are not much different.

Part 3

Now the bodies part are still not move much but add more
acting on arms, shoulders and legs instead.

Part 4

The last page we have standing sitting and lying on floor poses and their
body still not move or bend so much.

I hope this will help you guys get some ideas about the body.
    

I'll make some reference about more dynamic pose
(and maybe acrobatics pose. lol) sometime later.     

10/31/2011

New pic, Skeches October 2011 & Happy Halloween

Hi everyone, 
          From now I decide to post the color works on this blog too.
Hope you like them. :P  

This one is color picture of old sketch I already post. 


Ooh...he's cumming!! lol


Now get back to this month sketches. ^ ^


And the last....Happy Halloween Everyone. XD


10/01/2011

Sketch September 2011 & basic lightning

Hello everyone sketches for September are finally posted along with examples of basic lightning.
I will use pecil sketches for base picture and do the lightning with hard brush and eraser tool in photoshop.


Now let's begin with this guy.


And lightning...with hard-brush. The lightsource is on upper right corner
so...the cast shadow will be on lower left.
Don't for get to add a little reflect light on the edge.


Next...


The lightsource is on the right...
add more details with the reflect light on the edge of the left-side.


Next..


Now try lower lightsource.
The shadow will be on the upper part of muscles.


Next...


The light is on the upper right behind the changing guys... upper right infront of nude guy.
So even in the same room...the lightning of each objects are different depend on their location.


Ok..next one.


The lightsource is on the upper infront of him...


Now the last one...more erotic..hehe


Only soft lightsource is infront of picture...and add more darker color on the edge.


I still not good at the description...but I hope they could be a little helpful for you.
Thanks for reading. ^ _ ^

8/27/2011

Male head reference sheet

As promise.... XD
I hope these will be useful.

Part 1


Part 2


Next time I will make something about muscle body.

Sketch August 2011

Hi! everyone...sketches of August are ready to serve...hehe
Let's enjoy them.


It's look like he's waiting for something. lol


More lower!!


He really can't put it in his underwear. XD


Another good view.


Oh~look like he got what he want now.


That's all for this month..

Hope you all have a good time. = w =


7/25/2011

Coloring step : Guardian of water

As promise Coloring step of my picture " guardian of water".
I hope it will be useful.


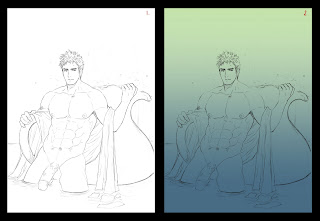
1. Pencil sketch. Do some adjustment (level or curve) in photo shop to make it sharpen and clean with eraser tool.
And don't forget to change layer mode to multiply.

2. Create new layer under the line and use gradient tool to color the base tone.
You can create more layers to coloring another parts.


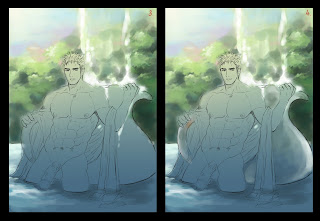
3. Rough coloring background by simple round brush.

4. Rough coloring jar.


5. Coloring skin base by hard round-brush and blend it with soft-round brush.

6. Coloring fabric.


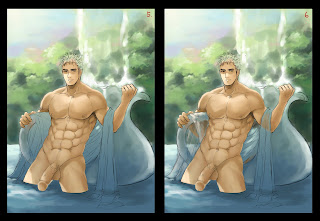
7. Now create a new layer over sketch line. Add more details on skin and muscle.

8. The face look weird so I will draw a new one. First is remove line art by erase the line or
paint the base color over line art.


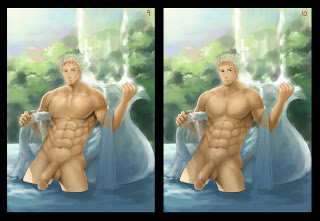
9. Draw a new face line with dark brown color.

10. Pick more darker color and paint more details. For the body...use more darker color and paint the shadow.


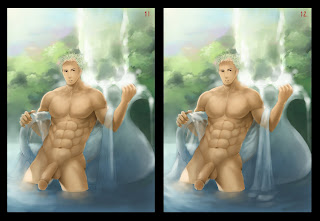
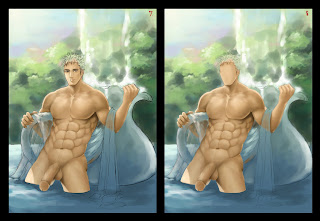
11. Paint BG with very soft brush.

12. Do the same with fabric.


13. Paint the trees with hard brush.

14. Paint the falling water with soft brush.


15. Paint the details with smaller and harder brush.

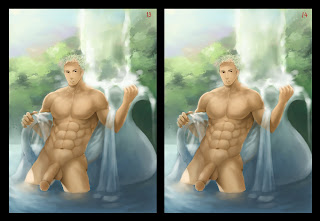
16. Continue paint face with soft brush and sharpen the edges with line.


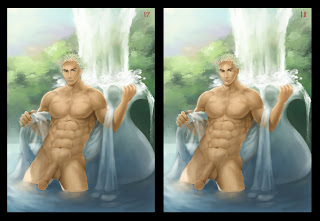
17. Add more lighten color on body skin.

18. Continue adding on the face.


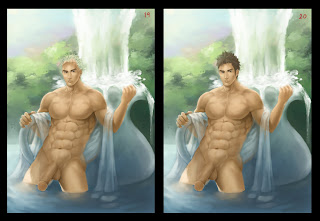
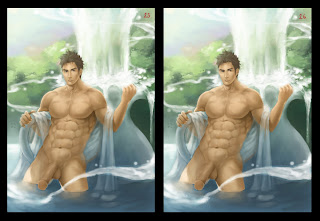
19. Add more details on fabric.

20. Coloring the hair with soft brush and line.


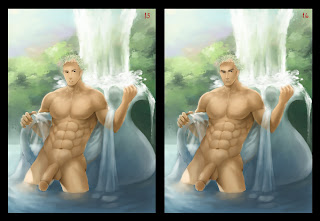
21.-22. Paint flowing water with hard brush


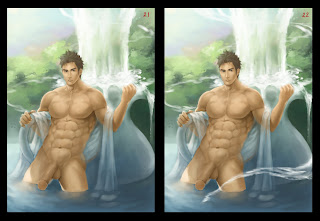
23. Use soft brush the blend the flowing water.

24. Add more splash water.


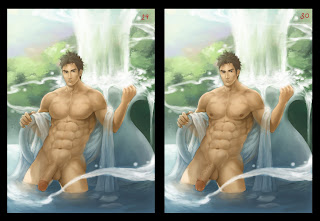
25. Add more lightning on flowing water with soft light mode layer.

26. Use texture brush to paint more details.


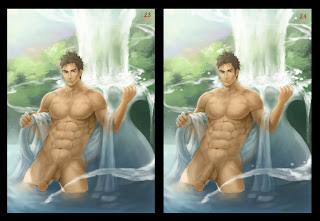
27. Draw the line art around the man.

28. Adding more details on fabric.


29. Now coloring the penis and draw the line around it.

30. Adding more details on it and painting nipples.


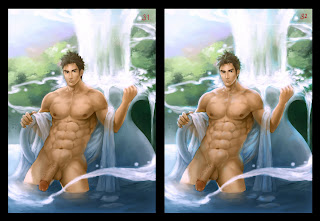
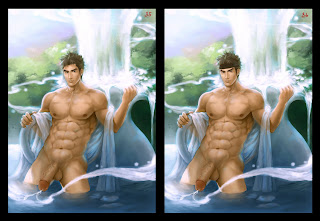
31. Do the color adjustment by try to use level adjustment in different color channel.

32. Add the blue light by overlay mode layer.


33. Draw pubic hair.

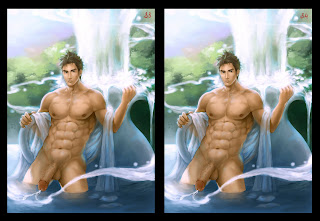
34. Paint water drops on the man.


35. Use liquify filter to adjust the body and face.

36. Try to give him a new hair style by add the headband first.


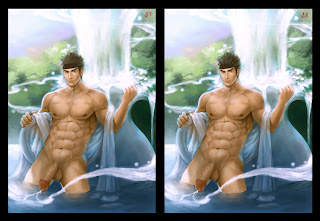
37. Use soft brush to paint the new hair base over it.

38. Draw the hair lines and add the new hair lightning.


39. Paint the headband detail.

40. Make the face skin more smoother and add a little change to the lips. Finish!!


Oh my...It turn out to be a very long post. lol
So tired... - -"

Hope you enjoy it.
Next time I will try make the tutorial about "how to draw the muscle".
I hope it will be useful.